Monday, January 23, 2012

Simply Altered

So, I've seen these fabulous altered notebooks and had to find an excuse to play with one.  My husband is a big hunter and has always wanted a place to document his trips.  I've had some paper I'd been saving for years to make just the right project for him, and I finally got to use them on this project. 

This was a composition notebook that I decorated.
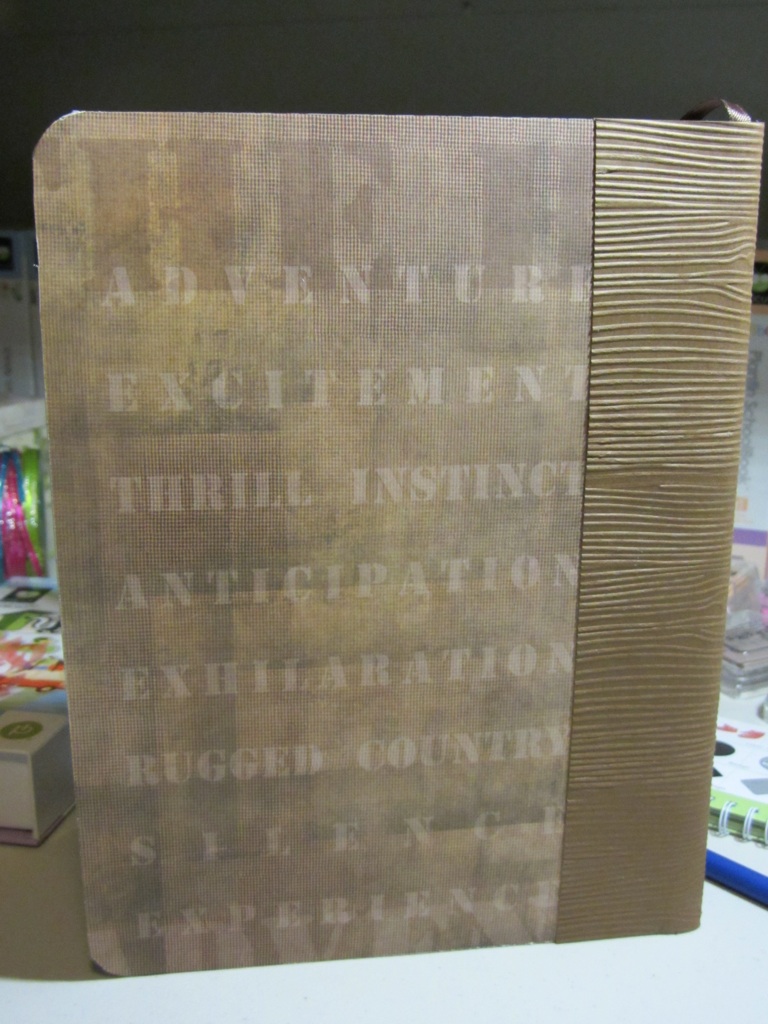
Here is the cover:
I took a 4.25inch piece of brown carstock and ran it through my cuttle bug a few times using my wood design folder to add the texture to the binding.  It was his favorite part.
Here is a view of the back:
And this was a part I just couldn't resist... My husband is 6'7" and has nick-names of Magilla Gorilla, Chewy, Sasquatch, etc.... Knowing that, will make this next picture funny:

it's a littel hard to see in this picture but i added a place marker ribbon to the book also.

I hope you enjoy it, it's one of my favorite projects I've created to date.  I might make another one just to keep since he's already stashed it away.


Mickey Mouse Birthday Party

A friend of mine from work is hosting a Mickey themed Birthday Party for her son's 2nd Birthday.  He loves both Thomas the Train and Mickey.  I came across a perfect clipart that I used for the invites and the banner. 

I don't have the Mickey cartridge so I used my Gypsy and created the silhouette for the banner.  I pulled clipart and printed it on cardstock white paper. 

Here is the invitation I made:
She also wanted cupcake toppers, this is the sample I made, the real ones were put on 4 inch skewer sticks:
And a banner too, I've come to really enjoy making banners, I just have to learn how to scale them down so they're not life like.  lol
This one I did in 3 different sections mostly so that she could take the part with his name and put it up in his room after the party for decorations.  When I gave it to her today, she was in awe, she loved it and said it was perfect. 


 Here's a close up of the detail.  I added white faux stitching to the silhouette's and the train circles, I also added black faux stitching to the letters to make them stand out. 

Jaded Blossom Fun

So, I ordered the wonderful new Jaded Blossom stamps (buy them here http://jadedblossom.bigcartel.com/) and received them in the mail on Thursday, it was all I could do to wait for the weekend to be able to play with them. 

I had some left over red and green M&M's from Christmas goodies so I whipped up some quick candy sticks. 

Here's my Cupid Hearts:
I stamped the poem on white cardstock and chaked the edges with a dusty rose color
The cupid character, I stamped and punched out with a Tag punch from Stampin it Up, also chalking the edges with the same rose color as the poem.  I colored the cupid with my copic marker E11 for the skin and all the hair, clothes, wings, and bow and arrow are colored with atyou spica glitter pens. 
I topped off the red M&M stick with these tags and a pink and silver glittery bow. 


Here's a candy stick I made with the leprechaun, I absolutley adore this little guy, I think I'm going to try and hide him in projects throughout the year.  He he.
Very similar to the cupid, I stamped the poem in green, chalked the edges with a vintage brown.
The leprechaun, I colored using my E11 Copic marker, and lime green, and manderine sharpie.  His pants, shoes, golden buckles, and hair are all colored with my atyou spica glitter pens.


I also was in awe with all the valentines goodies that were on the Valentine Treats Stamp sheet so I tried to use as many of them as I could.  I did practice for the first time using my embossing gun on the XO's on the page, I certainly need to keep practicing but it turned out to be a cute card.  I used light colored chalk inks for the inside of the conversation hearts so they're a little hard to see. 


Monday, January 16, 2012

Cutting boards

I found this idea in one of the cricut magazines and I just have to show you what I've been doing with it. It's high performance outdoor vinyl I bought from a local commercial sticker factory and s glass cutting board. They've all been personalized in a way for each person who personalized them.

I hope you like them as much as I enjoy making them.

Monday, January 9, 2012

Aloha!!!

Aloha! 
My husband's grandma has a fantastic retired life.  She enjoys her days doing whatever her heart desires with her cute dogs by her side and every other year she gets to go to Hawaii for a vacation.  This isn't the typical vacation that you or I would plan for; she's enjoying the island for a month at a time.  What a lucky lady!  She asked me to make her some easle cards to take with her and send out to family and friends while she's there.  I also made a different one for her to send out to her friend who she's going with.  I'm sure she'll have a great trip.  I'll be looking at these images, thinking of the sun while I watch the frost melt off my windows.  I can't wait to see her pictures when she gets back and hear all of her stories of their adventures. 

I used the Hula Anya stamp from TGF (The Greeting Farm) and got to use my cousins copic markers to color these ladies.  I then used my atyou spica pens to add some glitter to their hair, flowers, and grass skirts.  I'm thinking I need to make one extra for my collection, I love the way they turned out.  They each have matching 5x5 envelopes with them (not shown).